by David Strom
After having my laptop stolen from the trunk of my locked car in a shopping mall parking lot, I am very paranoid about making copies of my data. Apple’s latest version of the Mac OS includes backup software called Time Machine that will make regular copies of the files on your hard drive. But what if you aren’t running this version (10.5) or want to use something else? My recommendation is a product called SuperDuper. You can try it for free with some limitations before you purchase a copy for less than $30.
What is the difference? TimeMachine is designed to recover a couple of files, in case you accidentally delete them. SuperDuper is designed to recover your entire hard drive, in case your machine completely crashes, or is stolen. It does this by making an entire copy of your drive that you can boot from, either on the same Mac (if you have a second hard drive installed) or on a new machine (via a firewire or USB cable). It is very easy to set up and operate, and the paid version uses “smart backups” whereby it copies just the files that have changed since the last time, saving your time. I run it a few times a week, and keep the backup drive at home since my laptop is mostly in my office. My backups take less than an hour usually.
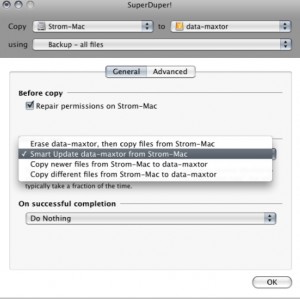
The software is extremely simple to use both to backup and recover files. You select the source and target volumes that you want to use, and select the “backup all files” option. When you click on the options button, you have several automation options as you see in the screenshot below. You can erase and start from scratch, do the smart update as mentioned above, or copy newer or files that have changed since your last backup. You can also set the backup drive as the main startup drive when finished too.
David Strom is an expert on Internet and networking technologies who was the former editor-in-chief at Network Computing, Tom’s Hardware.com, and DigitalLanding.com. He currently writes regularly for PC World, Baseline Magazine, and the New York Times and is also a professional speaker, podcaster and blogs at strominator.com and WebInformant.tv.
