by David Hakala
Sometimes you have to prepare a brand new hard drive for use. At other times, you may have to reformat a badly messed-up hard drive; that is, wipe it clean and start over with a fresh installation of Windows and all your applications and data. Either need calls for formatting the hard drive. It’s simple, but it takes a bit of time and you have to be careful to preserve irreplaceable data.
First, copy everything on the drive that you want to keep onto another drive or burn it to a CD or DVD disc. When you format a drive, everything on it is wiped out.
You can format a drive from within Windows if it is not the drive that contains your Windows operating system. When you are ready to format the drive, do this:
Click Start, then My Computer
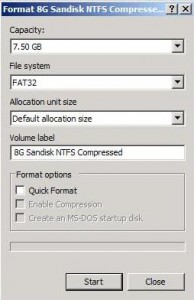
Right-click on the drive and select Format from the context menu
Windows reads and displays the drive’s maximum capacity automatically. You can set a lower capacity if you wish, leaving some “unallocated” space in which to create another logical drive later.
The File System is the method of organizing and storing data used on the drive. The options are FAT16, FAT32, and NTFS. Generally, you want to use NTFS.
The Allocation Unit Size is the size, in bytes, of the blocks of space in which data is stored. For general purposes, the default allocation size is fine. If the drive is used mainly for large data files, increasing the default allocation size will speed up reads and writes. Be aware that larger allocation unit sizes waste some storage space.
The Volume Label is any name you want to give the drive, i. e., “My Main Drive”. It will be displayed in My Computer along with the drive letter, i. e., C:, D:, etc.
The Quick Format option only wipes out the index in which the locations of data are stored, leaving the data itself intact. If you are in a hurry, use Quick Format. But it’s better to format the entire drive to wipe out any traces of old data that might cause problems when they are overwritten.
Enabling compression lets you store more data on the drive, but you pay a performance price as data must be compressed and decompressed whenever it is read or written.
“Create an MS-DOS startup disk” adds system files to the formatting process that enable you to boot from that drive. Generally, you don’t want to do this.
When your options are all selected, click OK and confirm that yes, you really want to wipe everything that’s on the drive. Then go have some coffee. Formatting a large drive can take half an hour.
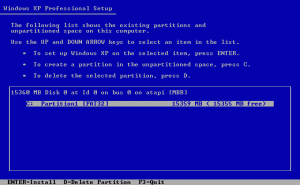
If you are formatting a drive that will contain a new installation of Windows, you will need your original Windows installation CDs. Start Windows Setup and follow the prompts of the installation process. Setup will show you the existing partitions on the drive.
You can create new partition(s) in any unallocated space, but you cannot change existing partitions.
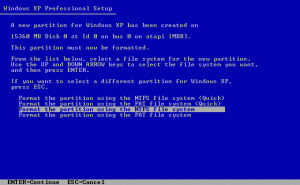
Next, Setup will show you any available partitions and ask if you wish to format one.
After formatting, Setup will ask which drive you want to install Windows on.
David Hakala has perpetrated technology tutorials since 1988 in addition to committing tech journalism, documentation, Web sites, marketing collateral, and profitable prose in general. His complete rap sheet can be seen at http://www.linkedin.com/in/dhakala


{ 1 comment }
I have a question regarding this operation that I didn’t see covered in the article.
There is a ‘Restore device defaults’ option. Why would I want to select this… or why would I not want to select this?
Comments on this entry are closed.