by Stewart Vardaman
Why build your own? A server typically needs much more disk space and not as powerful a CPU as a desktop PC. You can choose exactly the components you need. Me, I use my server to: back up my two laptops; store my movies, TV shows, and music collection too big to fit on a laptop’s drive; act as a wired/WiFi internet router; share files/Internet with three other people in my apartment building … and much more.
I focused on lower electricity bills by using a low wattage processor – the Athlon 64 X2 5050e (2.6ghz), drawing just 45 watts. The high-end CPUs today use 130-150 watts. In New York state, for example, a year’s worth of electricity to a top-line Intel Core 2 Extreme is $240 vs. $71 for the AMD.
Next, get the largest drives you can afford. My stuff is about 400 gig, so I went with two one terabyte drives, in a mirrored setup. Mirroring means two gigs become only one gig because they write data twice to both drives, in case one dies. If one does die, the system still stays up.
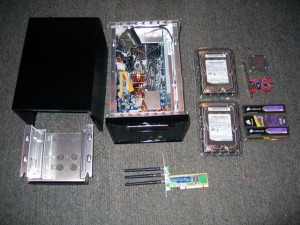
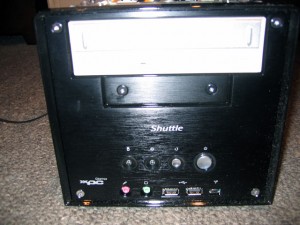
I used a Shuttle SN68SG2 bare-bones case — it’s a small cube, about 12” x 8” x 8”, to which I added an older Sony DVD burner, and 2 gig of RAM. I need three network connections – one to my DSL, one to a wired network, and one for wireless. The Shuttle has one built-in NIC, so I added a PCI WiFi card and a PCI Express wired card. I picked this kit because it has two expansion slots.
Barebones kits have never been easier to assemble. This kit even included a heatsink/cooling system called ICE2 and a small tube of thermal grease (it goes between the CPU and the heatsink), which used to be purchased separately, and assembly instructions with color photos. All you need is a #2 Phillips screwdriver and 30 minutes.
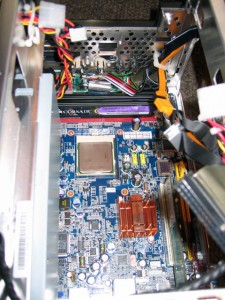
Start by opening the case and removing the heatsink. The square CPU will have one odd corner where there’s one pin missing, so aligning it properly is easy. The next step is the only tricky part – spread the grease from the tube evenly and thinly across the top of the CPU using a cotton swab, and don’t use too much.
You’ll understand that when you realize later the four spring-loaded screws apply more pressure between the heatsink and CPU than you suspect. The goal of the thermal goop is to smooth out the imperfect bonding of metal-to-metal plates and maximize removing heat from the CPU. Use too much goop and it’ll splatter when you tighten the CPU down. Use too little and the CPU can overheat.
Next, add the memory chips, network cards, and lastly the disks and DVD. Do it in that order because it works from the bottom of the case to the top. If you add disks first, you may have to remove them to get room to seat the memory chips.
Pop the cover back on and you’re done! Next, you’ll need to install an operating system.
Stewart Vardaman has been wearing a lot of hats in the IT business for over 20 years, and currently work as a web developer/Linux admin in the television industry.


{ 1 comment }
Didnt know the forum rules allowed such blirilant posts.
Comments on this entry are closed.