by Tina Gasperson
With the advent of digital photos, creating special presentations has become a fairly easy task for the home user. Why just print your photos out on photo paper? Now you can make a captivating multimedia show that will entertain your family and friends much more than flipping through a paper photo album.
If you have a DVD burner, you can purchase software that will convert your photos into a movie that you can play on any standard DVD player, complete with a menu, a music soundtrack, captions, and fancy transitions. You can even pan and zoom on the photo images themselves to add visual interest. The program you’ll need to accomplish this is called ProShow Gold. One of the most useful features of ProShow is its built-in DVD authoring tools that take you from photo storyline to ready-to-play DVD in just a few steps, without any specialized knowledge. For all its capabilities and features, ProShow is reasonably priced, in my opinion, at under $70.
If you don’t need a DVD file, but instead just want to make a video that you can play back on your computer or upload to a video service like YouTube.com, you’ll get off a lot cheaper – like free (though a little more spare on features like transitions and forget about pan/zoom). The first place to look is on your own system, under Accessories. Open up Windows MovieMaker and import your pictures, drag them to the storyline at the bottom of the screen, insert transitions, a soundtrack, maybe a few credits and a title screen, and then click “File,” “Save Movie File,” and select the type of file you need according to your purposes.
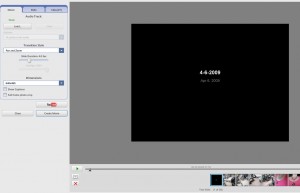
Another free program for saving photos in a video or movie format is Google’s Picasa 3. Open the program and select the photos you’d like to include in your movie. Click “Movie” at the bottom of the screen. Select your transition style, slide duration, and screen dimensions. Add an audio track if you wish, and click “Create Movie” – or if you know you want to upload to YouTube, click the YouTube button and Picasa will create and upload all at once. Picasa doesn’t have many user-adjustable features, but for a quick and easy photo video solution you can’t go wrong. If you do upload a photo video to YouTube, please consider posting a link to it here on Tiplet.com as a comment.
Tina Gasperson (tinahdee@gmail.com), affectionately known as Computer Lady by her family, has been writing about IT, home computing, and the Internet for more than a decade.


{ 1 comment }
说道:I enjoyed reidnag your very informative article content. It seems we think a lot alike. I am very impressed with your well-written content. You must truly enjoy being a writer.
Comments on this entry are closed.