by David Hakala
The article is a supplement to the Tiplet on how to Install and Use the Recovery Console in Windows XP. This one covers the case in which you receive an error message while installing Recovery Console similar to this one:
Setup cannot continue because the version of Windows on your computer is newer than the version on the CD.
This means that your Windows installation has been updated with one or more Service Packs, probably downloaded from Microsoft Update, since it was installed from your Windows XP CD. You have to use the Recovery Console designed for the newer version of Windows. There are three ways to get access to the appropriate Recovery Console:
Install the Recovery Console from the Windows XP Service Pack CD, if you have one.
Install Windows XP, then the Recovery Console, then the Service Pack, if you are re-installing Windows.
Install the Recovery Console from the Service Pack installation folder, if you have already installed Windows XP and the Service Pack. Here is how to integrate the Service Pack files into your Windows XP installation folder:
Create two new folders on your boot drive. For example, C:\XPCD\i386 and C:\XPSP.
Copy the files from the i386 folder of the Windows XP CD to the folder C:XPCD\i386.
Download the Windows XP Service Pack network installation package to C:\XPSP. Google “Windows XP Service Pack network installation package” without quotes to find links to the appropriate Service Pack.
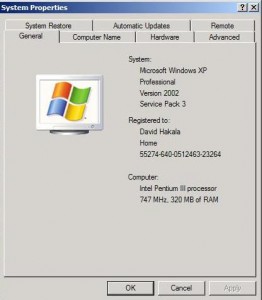
Which Service Pack you download depends on which one(s) you already have installed. Here is how to find out:
Click Start, Control Panel, System and choose the General tab. It will show the operating system and version, i. e., “Windows XP Service Pack 2”.
Enter cd C:\XPSP
Enter <Service Pack filename.exe> /integrate:C:\XPCD,
The Windows Service Pack Setup Wizard starts and notifies you that the Service Pack files are being integrated into the Windows XP installation folder. Follow the instructions in Setup Wizard.
After you complete the integration process,
Click Start, then Run, and enter C:\XPCD\i386\winnt32
This will update your Windows installation to the Service Pack and allow you to install Recovery Console.
David Hakala has perpetrated technology tutorials since 1988 in addition to committing tech journalism, documentation, Web sites, marketing collateral, and profitable prose in general. His complete rap sheet can be seen at http://www.linkedin.com/in/dhakala
