by James Turner
Let’s face it, bad things happen. Houses burn down. Rivers overflow into basements. Viruses wipe your hard drive. In any case, losing your data can be a painful, costly, time consuming nightmare. Luckily, if you own a Mac, there’s a fairly inexpensive way to get your data out of your house before something bad erases it from the face of the earth.
You will need:
1. A Mac of some variety with a Firewire (IEEE 1394) port.
2. An external SATA dock with a Firewire interface
3.Two or more SATA drives (2.5” or 3.5”)
SATA drive docks are becoming very inexpensive. They allow you to insert a bare SATA drive into the dock, and use it like a removable disk. You can find versions from manufacturers such as Vantek and Thermaltake. The more common variety have USB 2.0 and eSATA (external SATA) connectors, however I’ve found the USB 2.0 versions (at least from Vantek) to be a bit flakey, and it’s hard and expensive to find eSATA cards for Macs that work, so I recommend paying the little extra to get one that also does Firewire, and use one of your Mac’s Firewire ports instead.
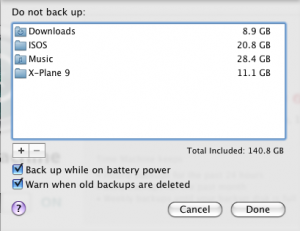
One you have the dock set up and attached to your Mac, stick one of your bare SATA drives into the dock and turn it on. If you’ve already turned on Time Machine, you should be asked if you wish to use this drive for Time Machine. If you answer yes, the drive will be reformatted and Time Machine will start doing its thing. You obviously want to use a drive that is larger than the size of the data you want to back up; you can tweak this using the Time Machine settings to limit what gets backed up. Preferably, you want it to be a good bit bigger, so that Time Machine has room to do the hourly incremental backups it does.
When you’re ready to move the backup offsite, make sure that Time Machine isn’t running (which you can tell by looking at the Time Machine icon in the bar), use the dismount button on the Finder to take the disk offline, and remove it from the dock. Now put it in an antistatic bag and store it wherever makes you feel safe. I rent a safety deposit box for $25 a year, and it turns out it’s just wide enough to hold a bare drive.
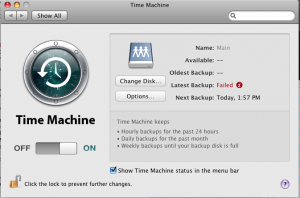
Meanwhile, take another bare drive and insert it in the dock. Time Machine won’t use it initially, but if you open up the Time Machine preferences window (right click on the Time Machine icon to get it), you’ll see an option called “Change Disk” click it, and point time machine at the new drive you mounted. After a quick reformat, Time Machine will start using that drive instead. You can then rotate between a drive in the dock and a drive stored offsite.
James Turner is a senior software engineer, freelance journalist and author of two books on Java, contributing editor for O’Reilly Media and a Correspondent to the Christian Science Monitor.


