by David Hakala
Sharing files and printers is one of the main benefits of having a network at home or office. A Windows network lets you easily share selected files and printers. This tutorial for Windows XP Pro assumes you have already set up your network and enabled file and printer sharing during the setup process. Now we will see how to share specific files, folders, and printers.
To share a folder:
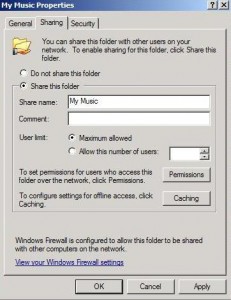
Right-click on the folder and select Properties.
Click on the Sharing tab.
Check the “Share this
If this is the first time you have shared a resource, you will see two cautionary screens from Windows. One says, “If you understand the security risks but want to share files without running the wizard, click here.” Go ahead and click there. On the next screen, select the “Just enable file sharing” radio button and click OK.
Give the folder a “share name.” It need not be the same as the folder’s name on your computer. “Dave’s Music” might be better than “My Music” in this example:
There are other options you can change on the Sharing tab. You can set a maximum number of users who can access files simultaneously, so that you computer won’t be bogged down if everyone in the office wants to see a document at the same time. You can also specify whether anyone except you can change the contents of files by adjusting the Permissions. Click on the Caching button to change how other users can access the files in your shared folder when they are not connected to the network.
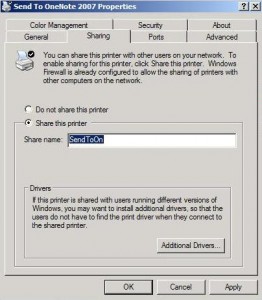
You share a printer in pretty much the same way that you share a folder.
Click Start, Control Panel, Printers and Faxes
Right-click on the printer you want to share and select Properties.
Click the Sharing tab. Enable sharing and give the printer a share name.
David Hakala has perpetrated technology tutorials since 1988 in addition to committing tech journalism, documentation, Web sites, marketing collateral, and profitable prose in general. His complete rap sheet can be seen at http://www.linkedin.com/in/dhakala

