by David Hakala
Sometimes your computer begins to act strangely after you install new software or hardware. If you cannot figure out why and correct the problem, you can return the system to its pre-installation state using the System Restore utility.
System Restore periodically saves snapshots of critical system files and some applications. You can then restore the system to one of these previous configurations when it was working properly. You can also take your own snapshot right before making major changes like adding an office suite or a new scanner.
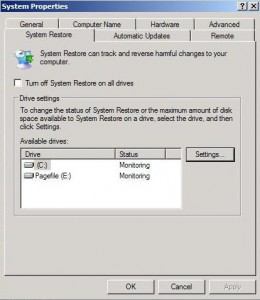
Of course, System Restore must be enabled in order to do its job. To make sure System Restore is enabled:
Click Start, then Control Panel, then System, and select the System Restore tab.
You must be logged in with an account that has administrator privileges to use System Restore. If you are, then:
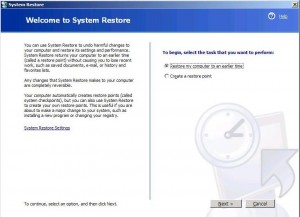
Click Start, then point to All Programs, Accessories, System Tools, and then click System Restore.
Click “Restore my computer to an earlier time” and then click Next. (Note: on this page, you can also choose to create a new System Restore Point.)
A message may appear that lists configuration changes that System Restore will make. Click OK.
On the “Confirm Restore Point Selection” page, click Next. System Restore restores the previous Windows XP configuration, and then restarts the computer.
Log on to the computer as Administrator. The System Restore Restoration Complete page is displayed.
Click OK.
Sometimes you cannot load Windows in Normal mode after making a change to the system. In that case, boot into Safe Mode With Command Prompt and run System Restore from there.
Restart the computer. Hold down the F8 key during restart.
Select Safe Mode with a Command Prompt.
Log on to an account that has Administrator privileges.
At the command prompt enter
%systemroot%\system32\restore\rstrui.exe
Where %systemroot% is usually C:\WINDOWS
The System Restore utility will start.
David Hakala has written technology tutorials since 1988, in addition to tech journalism, profitable content, documentation, and marketing collateral.

